Pages

Friday 16 November 2012

Belt Pouch Tutorial

Ack!  Sorry!  Life happened (again...).  I'll do a proper post early next week and tell you all the things I have been up to, but for now here's the long promised belt pouch tutorial.

Things you will need.

Scissors
Needle
Thread in a colour to match your fabric
22 cms of 2cm wide herringbone tape
A rectangle of non stretchy fabric 35cm x 15cm (we used velvet and brushed cotton)
8cm cotton tape (narrow width)
1 button (shank buttons ore preferably but any sort will work)

Step one

Take your fabric and place it in front of you.  as you can see I've over locked the edges of this fabric, which isn't essential, but I prefer as there's much less chance of fraying.

Pick an end and turn over a narrow hem.  Pin and sew, a running stitch is fine for this.
Folding my seam over
Adding pins in to hold it whilst I sew

All sewn - I used a contrasting thread so I could show what I was doing.

Step two

Fold your pouch into the shape you want at the end, with the seam end as the top of the pouch that the flap will fold over.  Mark with pins the edges of middle section (the bit that will be the back of the pouch when it's done) with pins and/or tailors chalk. 

Like this
Then open it out again

Sorry for the blurry pic...

This shows us where to put the belt loops.

Step three

Fold the ends of your herringbone tape down and pin them to the the back section of your pouch.  They want to be near the top (so closer to the seam end) but not completely by the top of your pin markings.

All pinned.

 Then stitch them down.  I use a back stitch for this, but anything works as long as it's strong.  No-one will see this bit because it's hidden by your belt so don't worry if it's not the neatest.


Step four

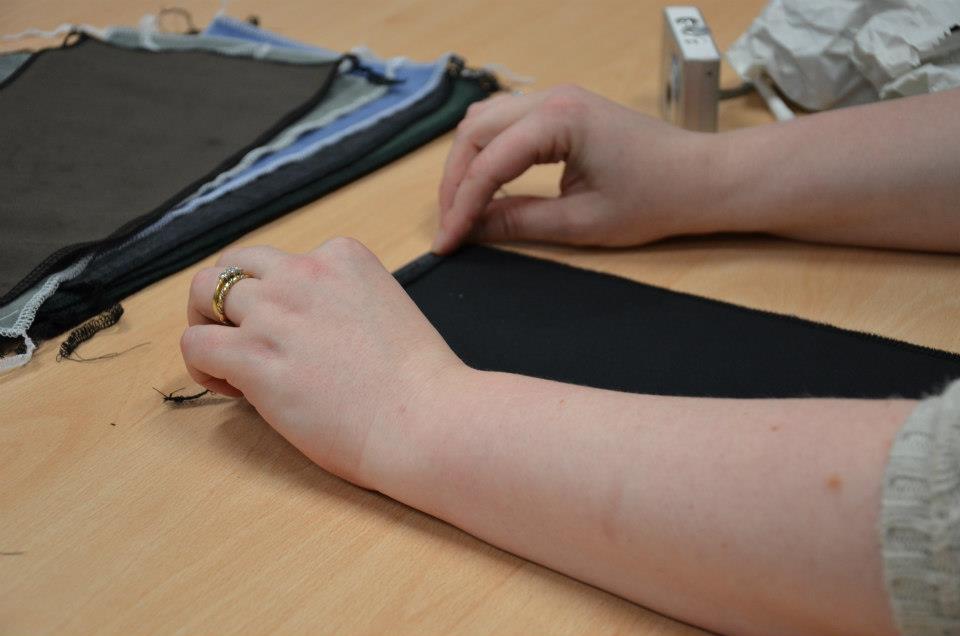
Fold the pouch back in the finished shape, only this time fold it inside out, so the straps are on the inside.

Pin it, then stitch the sides together.

Running stitch isn't any good for this as it will leave gaps (and no-one wants a gappy pouch), so use a back stitch for this bit.


Step five

Running stitch around the edge of the flap.  Then you can turn your pouch so it's the right side out.

All stitched but inside out
Nearly done now!
Step 6

Find the middle of your pouch flap.  Fold the cotton tape in half and stitch the ends to the pouch flap in the middle so you have a loop.   Depending on the size of your button you may want less tape.


Step seven

Fold the flap and using your loop work out where to place your button.  Now stitch it on.


And there you have it - a finished hand sewn pouch, all set for your larp!


Some of my 'pupils' and their finished creations!

I hope the above makes sense to you.  If you have any questions please leave a comment or email!

Tuesday 16 October 2012

Wedding Hair Fascinator

Just a small post tonight, as I've spent the day sorting fabric ready for my debut into teaching tomorrow (erk!) and doing committee type things.  I'm enjoying my time on the committee but I do wish there was a reliable voice to text program out there as my fingers hurt from all this typing I end up doing!

Anyhow, I was very busy last Friday as two of my dear friends were getting married the next day and the bridesmaids dresses needed some last minute alterations (tip to any future brides who read this blog - be in the same country as your dressmaker...).  This meant I got to spend a very pleasant day firstly helping with the church flowers, then a little light biscuit arranging before a small but dedicated group of seamstresses settled into one of the hotel rooms and got down to a nice afternoon of stichery wizardry.  I freely admit to adoring all things wedding so I had a very pleasant time and left in the late afternoon satisfied with a good job well done and very much looking forward to going to the wedding the next day.

Then I remembered I'd completely forgotten to take the time to go into town and buy a fascinator to wear.  Oopsie much?  But it was late and I was tired so I decided to do without.  After all, the world wouldn't end because I didn't have a frivolous bit of net and fake flowers would it?

Clearly my subconscious disagrees with me because I woke up early on Saturday full of creative impulses.  I rushed down stairs, found the scraps of fabric left over from the dress and carefully cut the applique flowers out.  I put a little tuck in the middle of each to make them more 3D then stitched them together.  I rummage through my hat trim bottle produced sprays of crystals and these also got stitched in and the whole thing got glue gunned to a handy hair clip.  In less time than it took to drink my morning cuppa I had a fascinator.


Here's a close up of the fascinator (which got me some funny looks when we took the pic!).  And below is the complete outfit.  Bonus points if you recognise the frock!


Sorry for the overly wordy post, but I felt this was a story worth sharing.  Hopefully you enjoyed it and I'll be back on Thursday with news of my sewing teaching prowess hopefully!

Friday 12 October 2012

Tabbards and Shirts

Well, only one of each really!  Just a quick post today as I have much exciting real life stuff to go do, but I wanted to show you all the other two things I've made for this years campaign characters so far!


First up is Dante's shirt.  Made of red cotton it's Simplicity 2310 but with modified sleeves, as Dante's player is not a fan of cuffs.  It's very simple in design, prettied up slightly by using fun hem stitch patterns.


I quite like the look of it really!

Next up is a very simple tabbard made for Master Piglet.


 Again, it's cotton, this time colour matched to the helmet!  The hammers are a symbol of our temple of might, the tabbard is mostly there to show Piglet as a templar from what I can tell.  I bound the neckline with bias tape and appliqued the design on and that's about as much as I can tell you really.

Right I am off to the crafty world of floristry, confetti cone making and last minute seamstress-ing.  Have a fabulous weekend!

Tuesday 9 October 2012

Scout Coat

Yes, it's that time of year again!  The start of our  new campaign!  This year I am playing an elven scout.  She's part of our military (the defenders, specifically the pathfinders) and a wild elf from the tribe of the Perdii.  She's also lots of fun!


Pathfinders do lots of crawling through grass and stuff so I wanted nice warm kit that will keep me dry.  It also needs to be vaguely camouflaged so I'm not too visible.
 
 So, clearly this was the right year to make a quilted coat!  Each panel was cut out of an old woollen blanket, then I laid green and brown scraps on top until I'd covered the panel.  I then trimmed around the edges, pinned it all in place and machine freehand quilted it, using a green and brown variegated thread.


At a guess this took around 4 hours per panel.  Some of them are patched on both sides, but mostly they have a plain cotton lining.


 In total I think the coat took 50 hours to make and it's not entirely finished yet.  I've blanket stitched the sleeve cuffs and I'd like to blanket stitch around the hood and down the front openings but that will take me a while and in the meantime I have other more urgent makes to do!

Oh and if you think the pattern looks familiar, well you guessed right!  It's good old Butterick 5425 again.  Much easier to sew without a lining...!
I was inspired by the awesome Xanthipe's coat which in our club is affectionately known as 'hobo coat' and grants the wearer invisibility in the woods.  As I managed to make some one jump on sunday because they hadn't seen me I'm hoping my coat too will grant me sneaky powers of sneaking!

Anyhow, I need to go attend to all my neglected chores.  Back on Thursday with the other bits of kit that have been used for this years campaign so far!

Tuesday 2 October 2012

Children's Kit

Once again I have been making mini kit for mini people.  Mostly to use up odds and ends of fabric and because the mini people I look after begged me to and I'm a softie when it comes to adoring 3 years olds who believe I am capable of doing anything.


The first up is a purple cloak.  For those of you thinking it looks like the last one I made, well, there's a reason for that.  It's more or less identical!  I liked the last one so much I thought another wouldn't hurt.  And it's been well recieved so I guess I was right there.  Purple corduroy and made from joining a hood and a semicircle. 


 This is a tiny frock coat.  I drafted the pattern myself.  The children haven't been overly impressed by the 'pirate' coat as they have called it, but it's the piece that has the most squeals from all the adults.  Blue corduroy with white taffeta lapels, white brodie anglaise cuff frills and silver plastic buttons.  It does up at the front, but I'm never expecting anyone to want to be buttoned into it.


This duck costume is the most popular.  In fact 'Mister Duck' came to visit me yesterday and we had a long and very interesting conversation about doing the shopping and dropping the kids off at nursery.  I played the part of the mummy duck and I was informed I did a good job.  My mini people say the cutest stuff!

The costume is made of white cotton drill.  It's a tabbard, with a hood that I appliqued fleece eyes onto and added a beak like peak to.  It then has an oval on the back that has strips of elastic little hands can be fed into to make flappy wings.  A definite hit this one and watch out for adult sizes potentially happening in the future...


This last one is a little different as it formed part of a goodbye present to some very good friends of mine who are shortly off on a big adventure.  The mini person here solemnly informed me that they would like to be a dinosaur some weeks ago. A bit of thought later and I came up with this.  It's a simple fleece jumper but the back of the jumper and the hoodie have had fleece spikes sandwiched in the centre seams.  I then added a tail complete with spikes.  The end result fits perfectly and is very popular. It has been worn a lot and the tail in particular is adored.

Ok, I need to swap laptop for sewing machine right now as it's the start of the new campaign on Sunday and my newest character currently has no clothes!  I hope to be back next week with a few other made pressies and obviously my new kit to show off!

Tuesday 18 September 2012

Sword Tidy

So, everyone has seen the hanging thingies the traders use to display weapons right?  At kit fairs and the like...

I have been worried about my weapons storage for a while, as I don't like leaning them up against the wall. So when I moved all my larp gear into the garage I took the time to make a 'sword tidy' of my very own.


 It's made of purple poly cotton, mainly because that was the first piece of fabric big enough to leap out of the horde. 

I measured where it was going to hang in the garage, then cut the fabric to size.  I trimmed the leftovers into for long strips.


The next step was to over lock every edge!  I'm far too lazy to change the over locker thread for something that's living in my garage, so as you can see it's all edged in white!

From then I made a simple loop at the top for the bamboo pole and then stitched the strips done at appropriate points.  The whole thing took maybe an hour to make?  And that includes measuring time...


 And here it is in all it's glory!  Now all my swords are neat and tidy and out of the way!


There is one problem though...  Since I made this I have acquired more weaponry.  So I need another tidy!  Oops?

Monday 3 September 2012

And The Holidays Are Over

Sad, but true.  My glorious summer has finished.  I've been making, but in a lazy, not much pressure kind of way, so not a lot to show.  Today I'm going to share a skirt I made with fabric my husband gave me for my birthday, then later in the week I'm hoping to show off my sword tidy I made for the garage!


Slightly different photography style today, as these pictures were taken for me by my stepdaughter.


The fabric is a floral print cotton and the pattern is my old favourite McCall's 5431.  As I threatened way back in January I have made a summer skirt!  I made the shorter length this time around and I really like how it hangs.  I'm also pleased at how much better I'm getting at inserting zips.

So, there you go.  The last summery thing I'll be making for a while.  The new larp year is approaching and I have driudic kit to attempt, along with a fire elementals stuff to design.  But more on those another time!